|
Getting
Started
Congratulation
on buying your Heng Long Tank from Tankzone. If yo haven't bought one yet. This
is the right place to start. We test all our tanks before we ship them so you
can be sure that your tank will work when it arrives. We also include from time
to time, free bonus pack of extra BB pellets, extra bottle of smoking oil or set
of AA batteries for the transmitter with all our 1/16 Heng Long Tanks. Those who
chose the model with the upgrade metal gearboxes also has the benefit of a higher
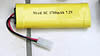
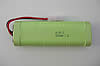
capacity 2000mAh Ni-Mh 7.2V battery instead of the standard 1700mAh Ni-Cd 7.2V
battery. Charging
the Battery Before
you can run your Heng Long Tank, you need to first fully charge the 7.2V rechargeable
battery with the basic charger. Both are included with the tank. The charger is
400mA. Therefore for a 1700mAh battery, charge it for just over 4.25 (1700/400)
hours for a full charge. For a 2000mAh, charge it for 5 hours. With
the Ni-Cd battery, it is best to run it down until it is exhausted before recharging
again. Use a discharger if you have one to discharge the battery before recharging.
This is to avoid the 'memory effect' where left over charge accumulates to degrade
the battery's ability to hold its charge and therefore reduce its lifespan. This
does not apply to the Ni-Mh battery, you can top up the charge whenever you like
with minimal affect on battery life. Getting
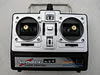
the Transmitter Ready The
transmitter requires 8 x standard AA batteries. Insert fresh batteries into transmitter.
Switch on the unit. The light above the switch should glow red. If no light shows,
don't panic. Ensure all batteries have good contact with the terminals by pushing
it from the spring end. Don't forget to screw in the transmitter aerial into the
top of the transmitter unit. This is important. Without the aerial, the tank would
not operate properly and you could damage your tank if it runs off on its own
from some stray signal. To
ensure that the tank is under control at all times, it is important to switch
the transmitter on before the tank. Switch off in the reverse sequence. That is
switch off tank first then transmitter. Getting
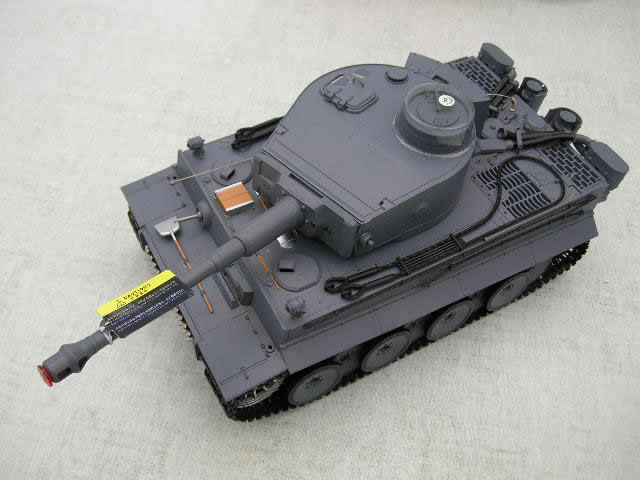
the Tank Ready Carefully
remove the tank from its packaging. It has been secured by wire and tape to its
box to avoid damage during transit. Carefully Insert the fully charged 7.2V stick
battery into the battery compartment on the bottom of the tank and connect to
terminal inside. It's a tight fit on some models. Replace lid to secure battery.
Switch on the tank using the larger switch. The other switch is for the smoke
unit. The headlights should flash indicating the tank is on standby mode ready
to receive the start command.
Starting Up the Tank To
start the tank, press the button with the engine icon. This is the leftmost of
the three buttons on the bottom of the transmitter. You should hear a whirling
sound signifying the engine turning and it will splutter into life. If the smoke
unit is switched on, you will also hear a whirling sound from the engine compartment.
This is smoke unit pump working. The headlights will flash for a few second then
it will stay on. This mean the tank is now ready to receive further commands from
the transmitter. If
the tank does not start, check to make sure the number of the transmitter crystal
(bottom right on the transmitter) is the same as the receiver crystal underneath
the tank. The receiver crystal is inside the battery compartment on some models. The
Smoke Unit The
smoke unit should already be primed at the factory so you should see smoke coming
out of the exhaust after a while once the heating filament has got working. If
no smoke comes out after a while, add a few drops of smoke oil into each nozzle.
Wait for the heating element to work. You should be able to see the smoke pumping
away after a while. You can switch off the smoke generating unit if you wish.
The switch is located underneath or on the side of the tank. It
is important that you don't keep adding smoke oil into the smoke unit if it doesn't
work quickly enough and end up flooding the heating chamber. Once it is flooded,
it would take the small heating element a long time to dry it out sufficiently
to create smoke again. Controlling
the Tank All
movement of the tank is controlled by the right joystick. The new smoking and
sound version also has proportional control of movement. Unlike the dummy trimmer
for the left joystick, the trimmer on the right joystick actually works! Use it
to adjust and fine-tune the horizontal and vertical controls. The movement control
is fairly obvious and self-explanatory. You will soon get familiar with it and
be able to control the tank properly. Push
the left joystick left or right to turn the turret left or right. Push the same
stick down to raise/lower the main gun. Push the left stick upward to fire the
BB gun. More below. Loading
and Firing the BB Gun All
1/16 Heng Long Tank has an airsoft BB gun built into its turret. There is a safety
switch inside the loader's (rectangular) hatch on top of the turret and the BB
gun can be switched off if you don't wish this feature to be used. You load the
BBs (up to about 40 at a time) through the Commander's hatch on top of the round
Cupola for the Tiger 1. It may be different for other models. When the gun is
switched on, BB is fired one at a time by pushing the left joystick upward. The
gun will keep firing if the left joystick is kept up. A red warning light on the
mantlet (front of the turret) glows red just the gun is being fired. The
BB Gun should only be used by children under adult supervision, Never aim the
gun at any person. It is quite powerful and can cause damage or injury if not
use responsibly. Tankzone is not liable for any injuries or damage caused by misuse
of the BB gun. Upgrade
and Replacement Parts Tankzone
stock a full range of replacement parts
for the Heng Long tank should you wish to attempt your own repair when parts are
worn or damaged. We also stock a wide range of after-market upgrade
parts to enable you to customise and create your dream model tank. There are
online visual guides and instructions to help
you.
Enjoy
your tank!
| 

